uxf-tutorial
Part 12 - Adding a VR SDK
We are finally at the part where just about the only thing left to do is make the task into a VR task. This can be complicated as the VR landscape is immature and there are lots of options, and the different packages available are constantly changing.
Unity does have VR support built into the engine, which means in theory we don’t have to add any packages to add VR functionality. However the Unity VR/AR (XR) support is not finished and does not yet support basic functionality like controllers, so is not suitable for our needs. We need to import a VR SDK which the headset we are using supports. These are usually available in the Asset Store.
- Most headsets: SteamVR
- Oculus headsets: Oculus Integration
SteamVR offers best compatibility but can be cumbersome to work with if you know you are working with a specific headset like the Oculus Rift. Windows Mixed Reality headsets can also be made to support SteamVR. In the future there may be a better catch-all solution through Unity/OpenXR but this is OK for now.
We will use SteamVR - So for this tutorial make sure you have SteamVR installed on your system (itself installed through Steam).
Setting up SteamVR
With SteamVR installed on your system, you will need to perform the necessary setup procedure such as performing room setup. Of you are using an Oculus HMD, you will need to do this on both the Oculus and SteamVR programs. I usually set up SteamVR as “standing only” mode.
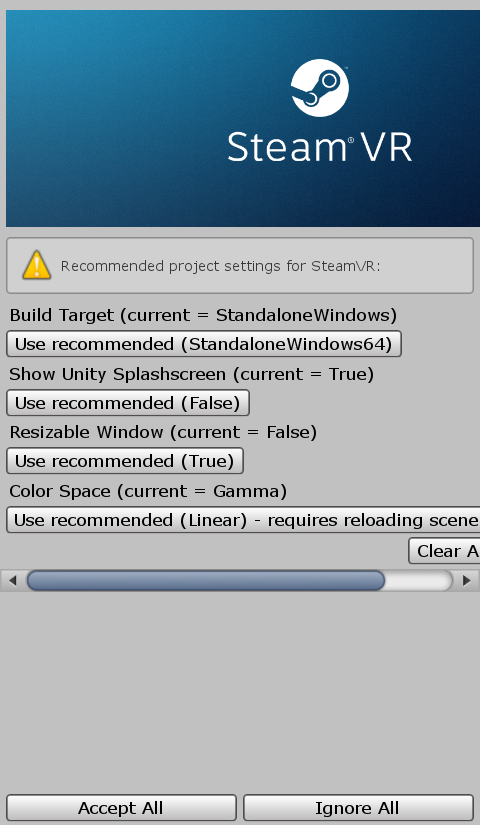
Now let’s import the SteamVR plugin for Unity from the link above (or searching STeamVR in the Asset Store). At the time of writing the SteamVR plugin version is ver. 2.3.2 (sdk 1.4.18) - so be aware things may change in later versions, so consult a recent VR development tutorial.

I downloaded and imported the SteamVR plugin. Then you’ll be asked to accept project changes. (You may notice colour changes after the change of colour space.)
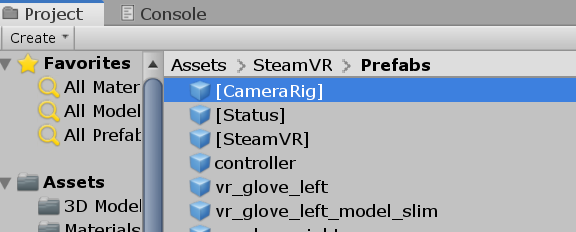
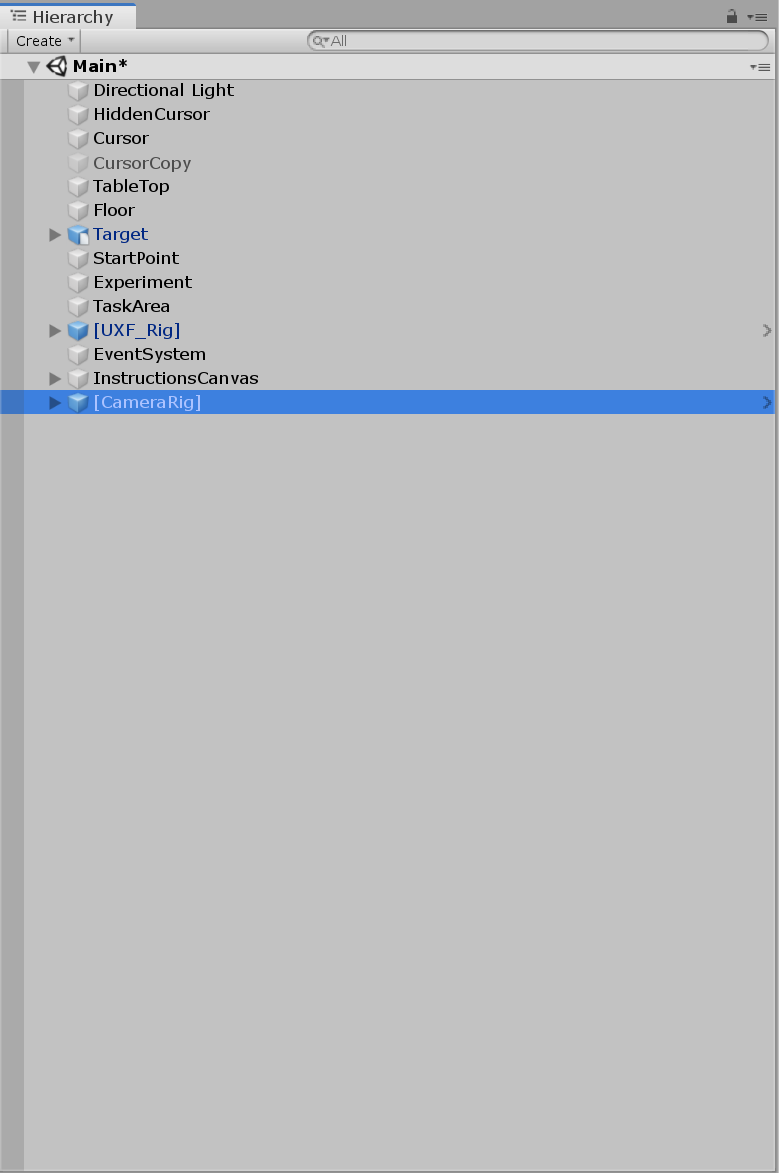
Now we have a SteamVR folder inside our project. The main thing we will need for this is the CameraRig. The CameraRig is a prefab that, when added to a scene, does all of the hard work connecting to the headset, displaying controllers, etc. Find this prefab and add it to our scene.
When we add it to our scene, make sure it is placed at [0, 0, 0]. That means the point on the floor in the centre of our physical space (as setup in the SteamVR room setup) will align with the origin of our Unity scene. We can of course move the CamerRig to a different place and we will be places in a different area of the scene. To begin playing in VR, we need to remove our other camera, which was previously used to render the image on our computer screen. Delete the “Main Camera” GameObject.
When you press play - you may be asked to generate SteamVR actions. These are used for inputs and outputs like button presses and vibrations on the controllers. Just allow the default action sets to generate for now.
Now when you press play - you should be stood inside your Unity Scene!
From herein, I will use videos because of the file size of GIFs. Click on a video to play
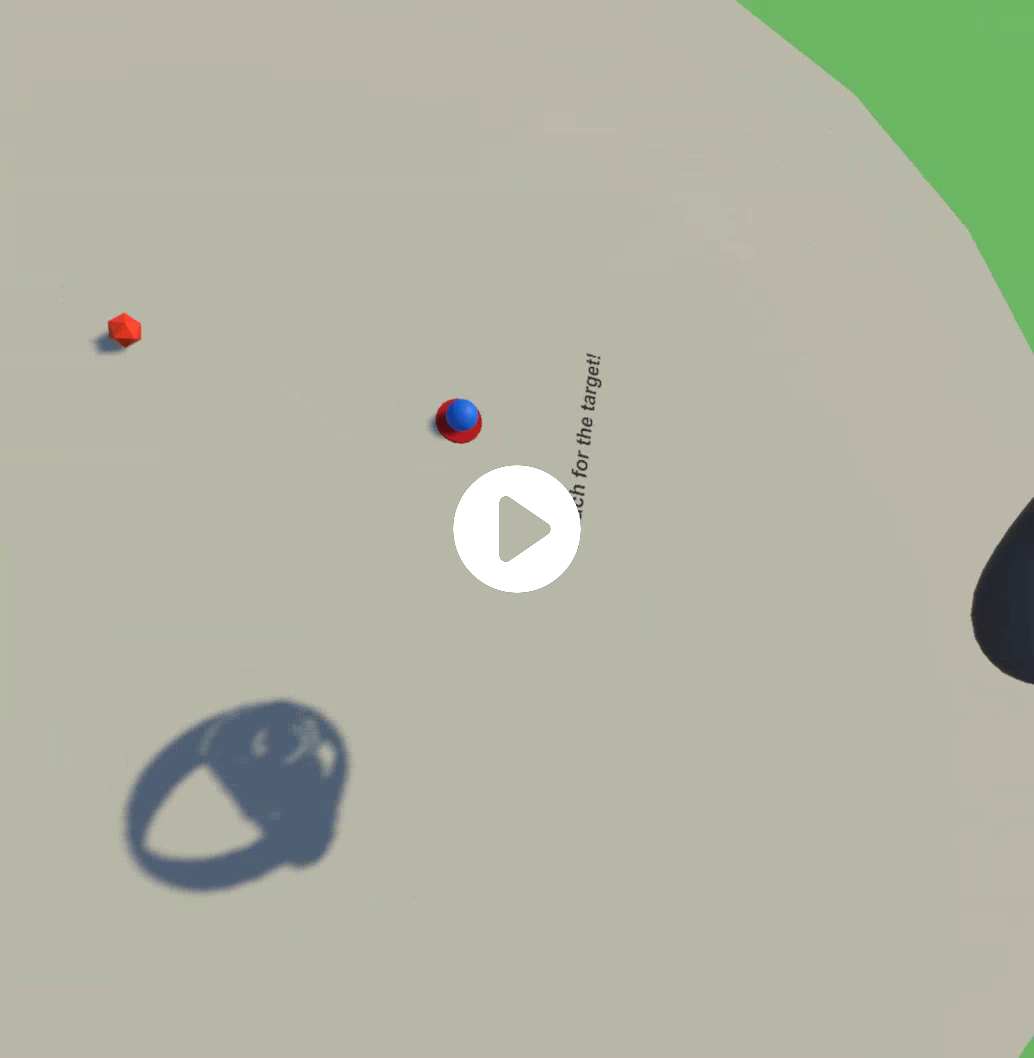
It’s worth playing around at this stage with cubes, or other objects to get a sense of Unity’s scenes in VR. 1 Unity unit = 1 meter by default so we should keep that in mind when placing and scaling our objects.
Fixing issues
Now we have VR enabled, we will need to migrate the controls from mouse to VR controller. Remove the MouseController script from the HiddenCursor GameObject. In the next part we will allow control of the cursor with our hand.