uxf-tutorial
Part 3 - Creating a start point
A very common aspect of many experiments involves the user moving their hand back to a starting position before the next trial begins. To make something like this in Unity, we will place an object in the centre of our workspace and give it the functionality it needs through a script. There is also an example of this built into the 2_MoveToTarget example supplied when you import UXF.
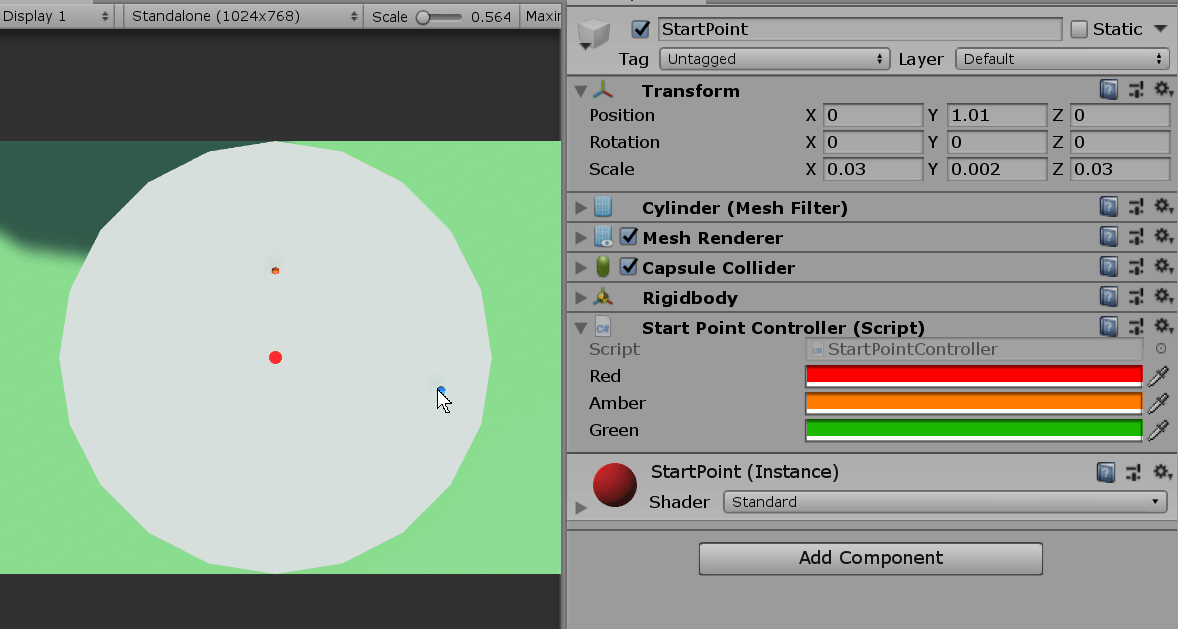
The start point GameObject
First let’s make a flat cylinder and name it StartPoint. I positioned it on the tabletop and scaled it to a flat size (see the transform component in the image below). I made a new material (I went with red - we are going to make a traffic light colour system) and assigned it to the StartPoint.
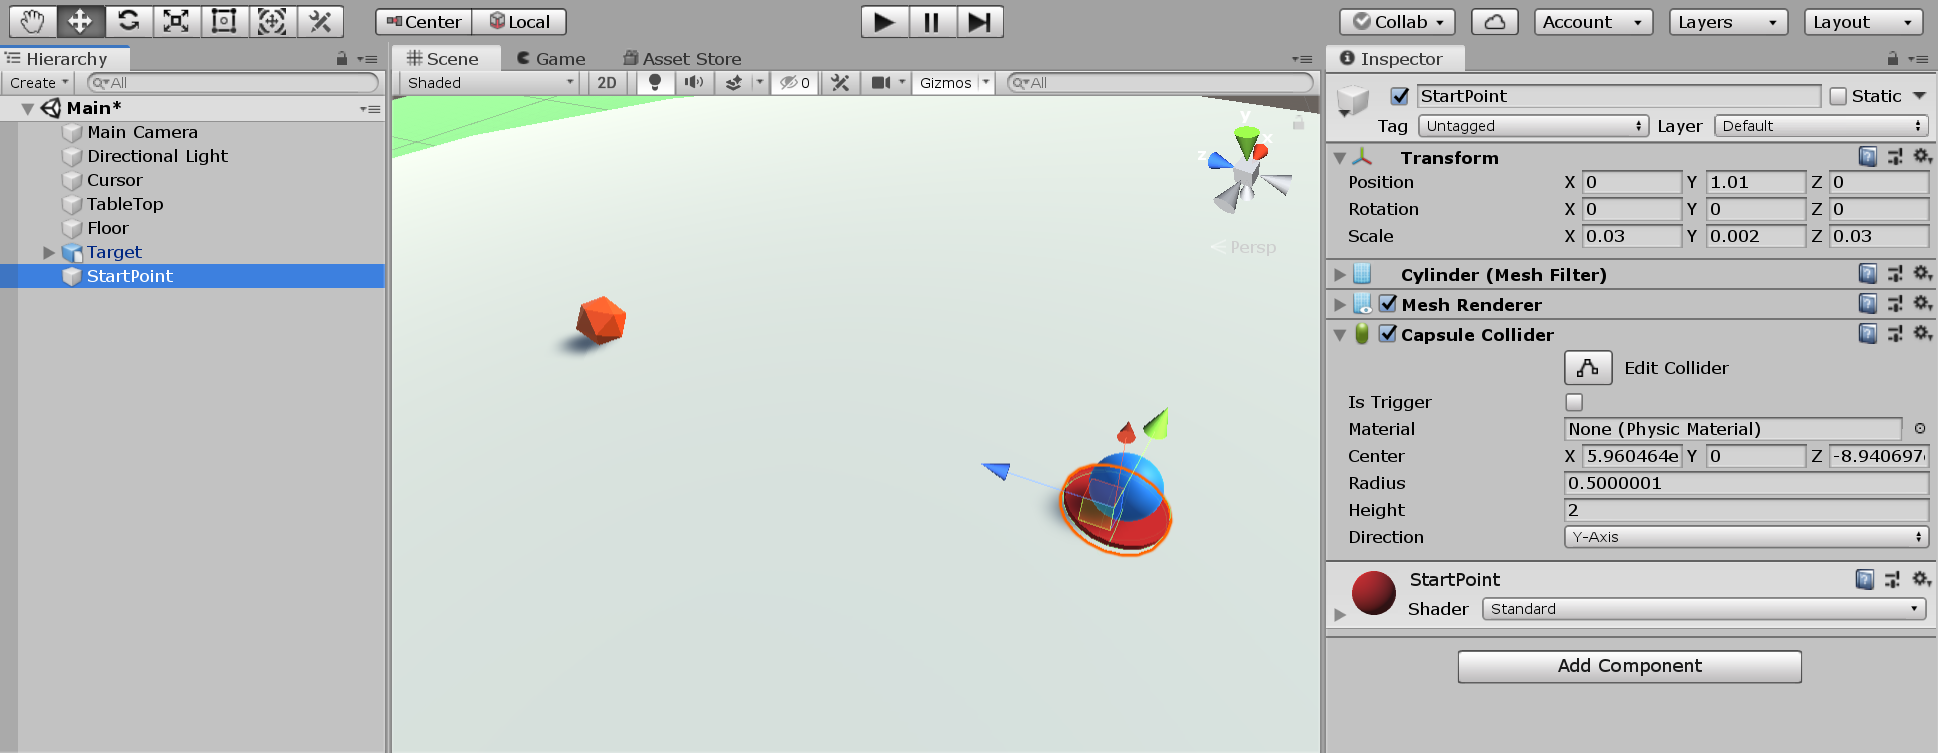
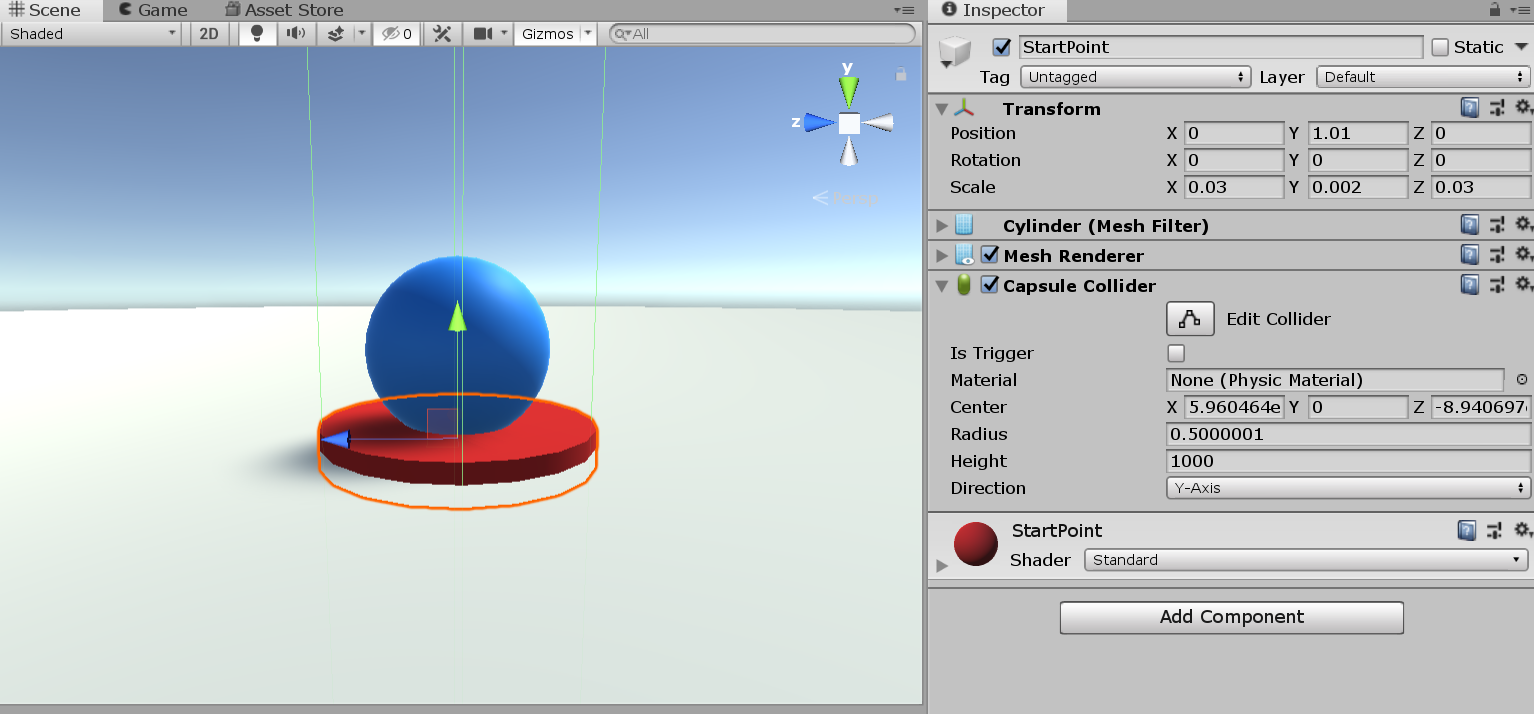
To give an object behaviour when we touch it, we can use a collider. A collider is a component attached to a GameObject that defines a boundary, and we can do something when we enter or exit this boundary. The shape of the collider does not have to match the physical appearance of the object. Notice all of the primitive objects we have created so far have a collider component attached. In the case of our StartPoint, it has a capsule collider (the default collider for cylinder objects). It has been shrunk down to match the approximate size of the cylinder. However, we are going to increase its size to make it so that any part of our Cursor can be touching our StartPoint to trigger it’s behaviour. We are doing this because we are essentially creating a 2D task in a 3D world. See in the image below I changed the value in the Height field to be 1000 which stretches the collider (shown as the green lines) upwards.
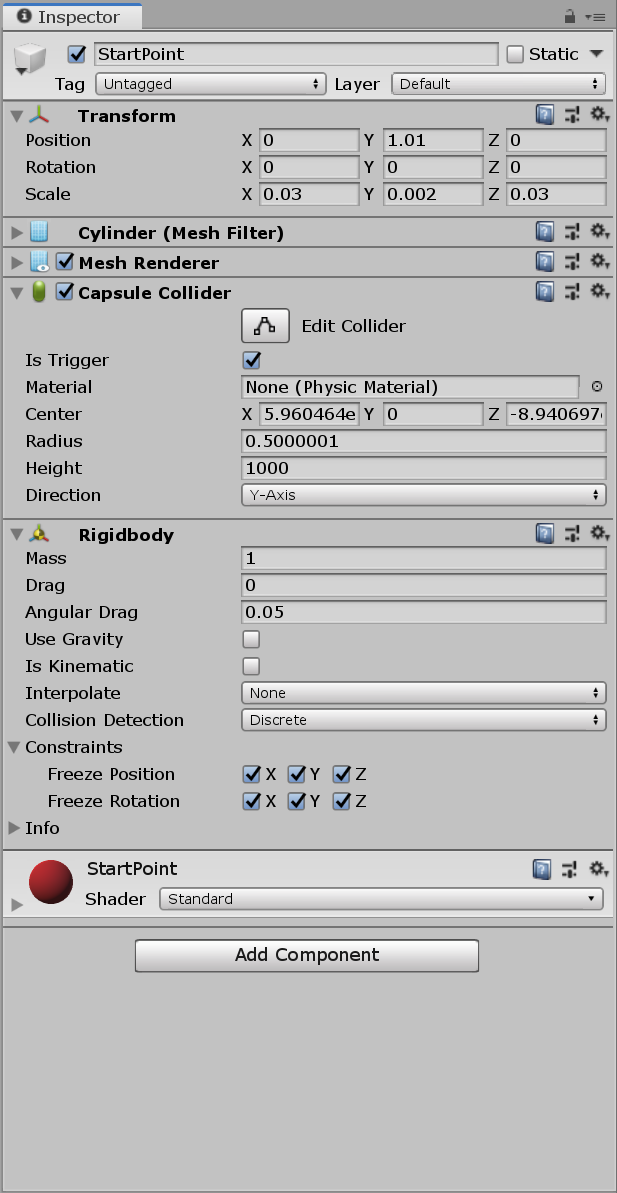
To make the start point recognise when we enter it, let’s change the collider to act as a trigger. This means Unity will not treat it as a physical object that we can roll around and we can bump into, but instead just trigger some behaviour when an object touches it. Additionally, we need to add a Rigidbody component to our start block before any interactions are registered. Unity only cares about physics interactions between objects where at least one of them has a Rigidbody attached. You can read more about how the Unity physics engine works here.
Notice below I enabled all the constraints and disabled Use Gravity (we want this StartPoint to stay firmly in place!).
(We will need to repeat these steps with the target too but we will do that later.)
Detecting an interaction
Now we are finally ready to start detecting when the Cursor moves into the StartPoint. Let’s create a C# called StartPointController in our scripts folder. First, we want to implement two of Unity’s special named methods. Anything we write inside methods OnTriggerEnter and OnTriggerExit are called when a collider enters or exits (respectively) the trigger collider attached to this GameObject. We can begin by just logging some text to the console (using Debug.Log(text)) when we enter or exit, to see if everything is set up correctly.
using System.Collections;
using System.Collections.Generic;
using UnityEngine;

public class StartPointController : MonoBehaviour
{
    /// OnTriggerEnter is called when the Collider 'other' enters the trigger.
    void OnTriggerEnter(Collider other)
    {
        Debug.Log("A collider entered the trigger!");
    }

    /// OnTriggerExit is called when the Collider 'other' has stopped touching the trigger.
    void OnTriggerExit(Collider other)
    {
        Debug.Log("A collider exited the trigger!");
    }
}
Attach StartPointController to our StartPoint and let’s test it!
Key point: We aren’t detecting if the mouse moves into the start point - but the Cursor game object. That will mean we wont have to change any of this code when we begin to control the Cursor with our hand in VR instead.
Instead of logging to the console we want a bit more sophisticated behaviour when we enter and exit the StartPoint. We want it to turn from red to amber when we enter, and then after a short time delay, turn green signalling the to user to reach for the target. To do this we need a reference to the material attached to the GameObject. We can do this by dragging and dropping with a public field like we did with the projectionCamera in the previous part. However, we know we want the material attached to this object so we can fetch it directly. We only need to fetch it once, so we fetch it in the Awake method (another special Unity method - called just before the game loads). We also create 3 variables to store the colours we need.
using System.Collections;
using System.Collections.Generic;
using UnityEngine;

public class StartPointController : MonoBehaviour
{
    // define 3 public variables - we can then assign their color values in the inspector.
    public Color red;
    public Color amber;
    public Color green;

    // reference to the material we want to change the color of.
    Material material;

    /// Awake is called when the script instance is being loaded.
    void Awake()
    {
        // get the material that is used to render this object (via the MeshRenderer component)
        material = GetComponent<MeshRenderer>().material;
    }

    /// OnTriggerEnter is called when the Collider 'other' enters the trigger.
    void OnTriggerEnter(Collider other)
    {
        material.color = amber;
    }

    /// OnTriggerExit is called when the Collider 'other' has stopped touching the trigger.
    void OnTriggerExit(Collider other)
    {
        material.color = red;
    }
}
Note: Material (uppercase M) refers to the type of the variable, and material is the name of the variable (this could be anything).
Those 3 colours we created don’t yet have any value - we assign them by clicking the fields in the StartPointController inspector. (Don’t forget to increase the opacity - the A component of the colour.)
We now want it to turn green after a delay. There are lots of ways to do this, but nicest way to do this in my opinion is using Coroutines. A Coroutine is function that (seemingly) runs parallel to the rest of the task. When our Cursor enters the StartPoint, we start a Coroutine which turns the StartPoint amber, and is then in the background checking (on each frame) if it is ready to turn green yet. Coroutines can be difficult to wrap your head around so you can read more here.
Why can’t we just use a time delay like time.sleep in Python or sleep in MATLAB? Because we can’t put the whole task to sleep - that would freeze the entire task, and in VR that means it would not update as the user moves their head (which would feel janky and also cause motion sickness).
We create a Coroutine by writing an method that returns an IEnumerator; we will call it Countdown. We will set the countdown time to 0.5 seconds for now. Also, we will stop the Coroutine when we leave the StartPoint. That means if we leave early, it will stop the countdown until we re-enter.
using System.Collections;
using System.Collections.Generic;
using UnityEngine;

public class StartPointController : MonoBehaviour
{
    // define 3 public variables - we can then assign their color values in the inspector.
    public Color red;
    public Color amber;
    public Color green;

    // reference to the material we want to change the color of.
    Material material;

    /// Awake is called when the script instance is being loaded.
    void Awake()
    {
        // get the material that is used to render this object (via the MeshRenderer component)
        material = GetComponent<MeshRenderer>().material;
    }

    IEnumerator Countdown()
    {
        yield return new WaitForSeconds(0.5f);
        material.color = green;
    }

    /// OnTriggerEnter is called when the Collider 'other' enters the trigger.
    void OnTriggerEnter(Collider other)
    {
        material.color = amber;
        StartCoroutine(Countdown());
    }

    /// OnTriggerExit is called when the Collider 'other' has stopped touching the trigger.
    void OnTriggerExit(Collider other)
    {
        StopAllCoroutines();
        material.color = red;
    }
}
One final change that is good practice is checking that the object the StartPoint is colliding with is actually the Cursor. If we make the task more complicated, we could have other objects touching the StartPoint and we don’t want these to begin the countdown. There are lots of ways to perform this validation but here we will just do a simple name check on the object using an if statement.
(Only the relevant methods shown below.)
    /// OnTriggerEnter is called when the Collider 'other' enters the trigger.
    void OnTriggerEnter(Collider other)
    {
        if (other.name == "Cursor")
        {
            material.color = amber;
            StartCoroutine(Countdown());
        }
    }

    /// OnTriggerExit is called when the Collider 'other' has stopped touching the trigger.
    void OnTriggerExit(Collider other)
    {
        if (other.name == "Cursor")
        {
            StopAllCoroutines();
            material.color = red;
        }
    }
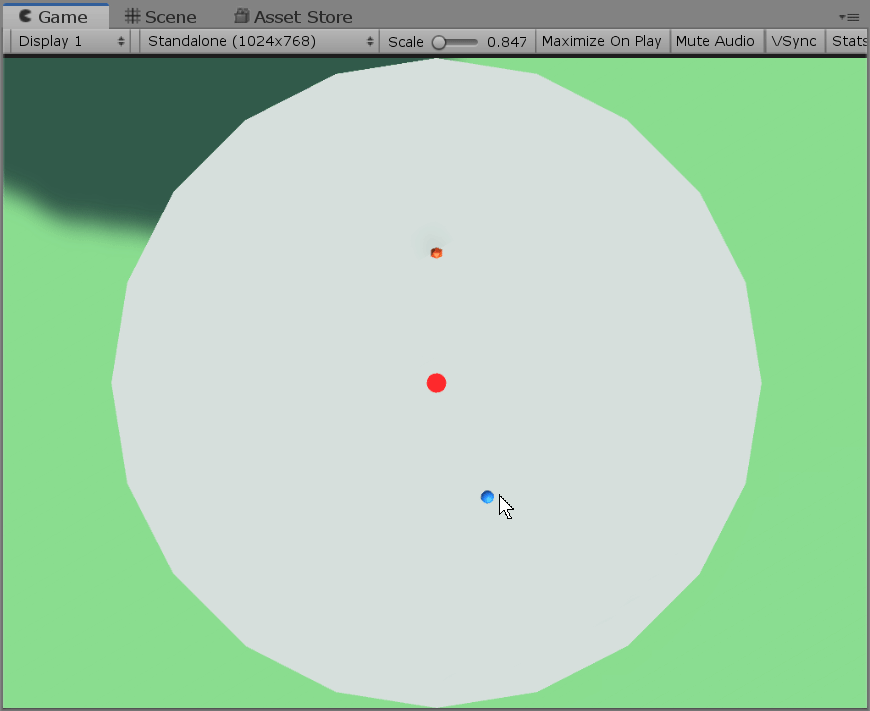
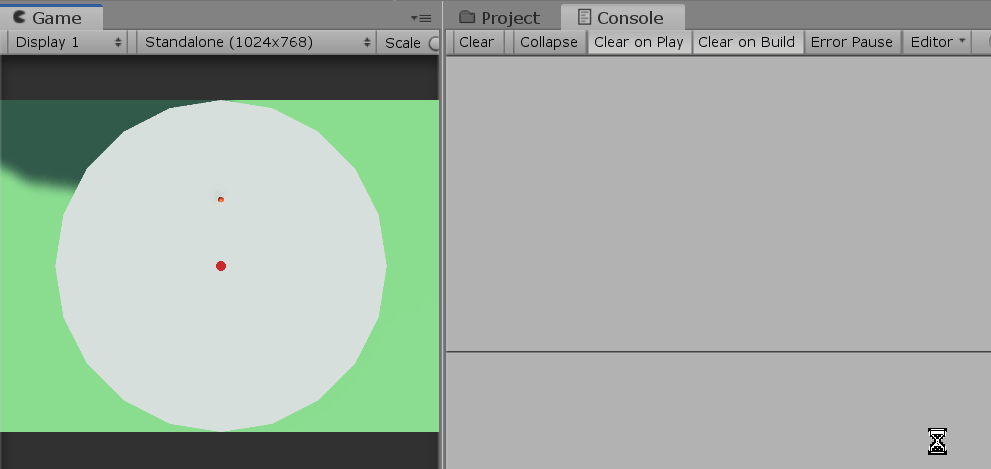
Final result: